Showing posts with label Organizer. Show all posts

2015 Wall Calendar/Organizer

Hello everyone!

Firstly, I would like to wish you a Happy New Year! The year started really great and I went to Bali for a week before school reopened (which explains the delayed post). This holiday I had been busy with a few projects and I finally decided to start something small. When I made my personal planner last year, I received a lot of good feedback. Since I did not make a new one for myself this year, I decided to make a wall calendar for my family to write our family plans. 

And I present to you 2015 Paint Splattered Themed Wall Calendar!


Last year when I did my own planner, people asked if I was selling them. But unfortunately, I wasn't confident enough to sell them. When I started on this project, I was super happy with the turn out and I have decided to put the printable up on sale. It is a handmade item and I designed them on Photoshop.


I printed them in 200gsm paper using my laser printer. Although the photo is edited due to the bad lighting, it looks pretty much the same after printing them out. However, colors may vary depending on your printer so you may want to get it printed at a local printing store.


I am putting this up for just $5 SGD. If you have any questions regarding printing mode, leave a comment below!


For Singaporean readers, if you guys are interested, you could email me via a contact form available on my sidebar or via instagram! You can make payment via bank transfer as well!

If you want me to print them out, additional charges would apply. Prices would vary depending on the type of paper, double-sided and postage. It also comes with a personalized cover page!


So for example, if you would like to get your calendar printed using 200gsm paper and have it double-sided it would cost $9.90 ($5 + $3.50 + $1.40 = $4.90).

As this is my first time doing this, I hope you could show me your support! If you do like this post, share it with your friends who would be interested. 

Thank you and have a great year ahead!

Personalized 2014 Planner/Organizer

Hello everyone!

As the year is coming to an end, most people will start looking for a perfect planner to use for the upcoming year. Likewise, I am one of them. I must say I really admire those of you who don't use a planner and can still keep up with your schedule. I have time management issues and with a planner I am trying to reduce that problem. There was once I lost a planner and I made plans with 3 different groups of people on the same day. Yes that happens me, please don't judge.

Anyway, the reason for this as you may have realized is to share with you a personalized planner that I made recently for a friend of mine because she wanted to give it as a gift for her friend's 21st birthday. (I hope I didn't lose you there). It is took me about 2-3 weeks to finish this whole project including presentation. I am so excited to show you guys because this is my first Planner project.

Disclaimer: I did not steal anything from anywhere. Everything is owned and done by me unless stated otherwise. In terms of design I researched for inspirations in various platforms such as blogs and Pinterest before creating my own version. I just thought I should clarify in case. 

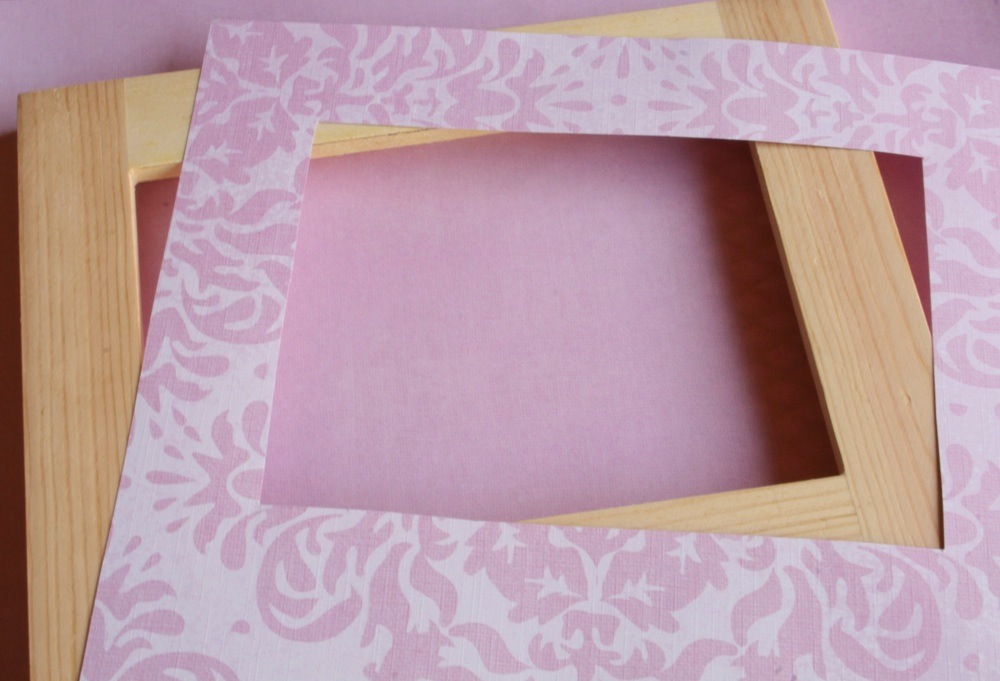
This is how I presented it, Planner with a slot in cover. Initially I bought this super cute pastel colored polka dot box but unfortunately it could not fit. I only had a few more hours before I met up with Shazeena to pass her the planner so I worked with what I could find at home. Using an empty cereal box and some leftover scrapbooking materials, I came with this one. 

I did a similar DIY tutorial on this. Click here if you are interested!

My paper was too small to fit the whole cover so I used fabric tape as the border to give the cover a more feminine and cute look.

 Sneak peak of the front cover.

TADA! The front cover.

Shazeena mentioned that her friend likes rings, skirts, sunglasses and she's a Tumblr-ish person. So I decided to make a Tumblr Inspired Cover. 

Click here if you are interested to know how to make it!

This is how the front page looks like. I made a small folder from craft paper in the front to slot in any receipts or small notes. I designed the inserts in Photoshop and used chevron prints as the main pattern design. 

I downloaded the chevron patterns from a site but I can't remember where. My sincere apologies to the designer because I am not able to personally credit you.  

The mandatory yearly calendar for the year. I used a basic nude color tone as the background and used brighter colors for the months to create a colorful contrast.

The months are basically the same throughout, the only difference is the way each month is introduced. In the beginning I used different colors for each month, but when I assembled them using Microsoft Publisher, it did not flow as a whole planner. So, I decided to stick with the same background for all the inserts.

Her birthday falls on the 30th October so I made this month slightly different compared to the rest.

Keeping the same color palette in mind, I designed the weekly planner to complement the monthly planner. I always run out of space when I fill in details in my monthly calendar, so I wanted to give extra space to jot down details as well.

To give this planner a more personalized touch, I added pictures to before introducing each month. I have this "Polaroid Action Tool" on Photoshop CS6. All I have to do is click on that action and it does everything for. Just how awesome is that? Also I inserted a translucent paper before each month.

This is the notes page.

 I am currently using a budget planner because the planner that my best friend made for me got wet and messed up. It was so horrible, Sorry Roslina! I still feel horrible about it.

I digress. I have a post-it inspired notes page in my current planner that I bought for $5 and I thought that it was really cute because I can paste pictures or any notes that I want to keep to just keep me going after a hard day. Since it was too cute, I used that as an inspiration to come up with my own version and this is the final look.

This design may be because of my own personal interest. As you can see from my blog header, it's a mustache with glasses. I was cracking my head on how to design the last notes page and then I came across a picture on Tumblr secretly telling me "use the mustache, it is so cute!". I may have exaggerated the details a little but that's the story behind this. 

A lot of things did not go according to plan:
1. I wanted to do a wire binding instead of the normal comb binding but due to time constraint I had to choose the latter. But it still turned out great! 
2. I forgot the set the colour in CMYK mode on Photoshop before starting on the design so there was a difference in the way the color turned out. Even so, after assembling them together it was pleasing to the eyes if I can say so myself. 
3. The pictures didn't really come out as high quality but the Polaroid effect didn't make it look too bad.
Even with these mishaps, I was really happy and proud with my work. October was a month that I had been dreading because of the overload of assignments but this project was a good distraction for me as I was able to take my mind off school for a while.

In terms of cost, I bought 120gsm paper and manually printed out using my printer. Let me just tell you how much I adore my printer. It is a BROTHER laser printer with color and auto-duplex print function. Plus it was less than $700 when my cousin and I bought it in the IT Fair just a few months back. I don't own a binder so I had to get it done in a Printing store.

That's basically it. I hope you're not disappointed that this is not a DIY tutorial. As most of the things were done on Photoshop, I am not able to do a step by step tutorial, Plus, I am just an amateur. I did not do this for free, Shazeena bought this from and I really want to thank her for her support. I will be doing my own planner this year and I hope to share with you guys by the end of this year.

If you are interested in any of my designs, I may be open to designing your own personalized 2014 planners. If you have your own printer and just want the printables, I will be able to do that as well. Planners and printables will be charged accordingly.

 So, if you guys are interested comment down below or reach me in any social media platforms (details are in my connect page). Do take note that I am still considering this and it will be subjected to the response I get. Unfortunately, this is only open to people who are in living in Singapore. 

Have a great start to the month and thank you for all the support! 

DIY Corkboard Crafts

Hey everyone!

It's been quite sometime since I've last posted and trust me this particular post has been under my drafts for a number of days already. This week is my orientation week and my mum wanted to do as much as possible in preparation to our favourite holiday, Hari Raya. I've been rather preoccupied and every time I sit down thinking that I have to complete this post no matter how busy I am, my tired body doesn't allow it.

So, I've been showing you guys a series of DIY organisers for your accessories, and this will be an addition to it. Actually, this particular DIY is multi-functional and you can alter it to your own needs.

As you can see from the picture, it's gonna be a DIY Corkboard crafts tutorial. I chose to use mine for my accessories. Unlike my pretty and vast collection of earrings, I'm not very bold or adventurous when it comes to necklaces, rings or headbands. But I still need a place to keep them so, I thought why not create my own?

I have listed down the supplies you would need below:

You can get these anywhere. Because I live in Singapore, the cheapest I could find was in Daiso where you can get them at $2. However, in terms of quality it fared just average. Like everyone would say, "You get what you pay for". But it was good enough for me as my collection is pretty small and light. 

At times like this, I really want to travel to the US just to get craft materials because most of the things are very affordable from what I have observed while watching lots of awesome Youtubers.

You would need some paint. I chose gold and black to have a very elegant and classy look. Also, it would match my gold makeup holders.

Always get creative with thumbtacks. I easily get bored with the same type of tacky coloured thumbtacks on my Corkboard which I use to pin important documents. Due to budget and time constraint, I bought all of them at Popular Bookstore. (1 set is less than $2)

One trick to spice things up would be through the use of glitter. Although I only own this colour, but I am absolutely in love with the idea of how it makes something so simple into something glamourous.

Some paintbrushes. In this case, the bigger the brushes, the better because the process could have been faster with a bigger brush or a sponge brush.

and lastly white glue. Some would choose to call it PVA glue. I must say, when I first bought this glue I was rather skeptical of its quality. But, for its cheap price, it's faring really well in my opinion. I got this from Popular as well.

So, let's get started!

First, paint the Corkboard with a colour of your choice. 

I would suggest using an acrylic paint instead of a poster paint as the colour lasts much longer.

Apply 2-3 coats for a more defined colour. As acrylic paint dries up pretty fast, the interval between each coat is about 10-15mins.

While waiting for the Corkboard to dry, customise the thumbtacks according to your preference. To stay true to my gold and black elegant theme, I wanted to glamorise the thumbtacks by adding some glitter. Firstly, apply a thin coat of white glue to the thumbtacks.

Next, pour the glitter into a small disposable bowl and drop the thumbtacks inside.

Leave them to dry for about 15-20mins depending on the size of your thumbtacks. At this point, do not worry if the glitter did not cover the thumbtacks fully because you can always apply a second coat.

While waiting for the thumbtacks to dry, you can now start on the border of the Corkboard. If you are happy with the border, you can leave it that way or add some embellishments according to the way you love it. I painted mine in gold and it was really pretty.

After applying 2 coats of glitter and letting them dry, apply one last layer of white glue. This is to prevent the glitter from falling out everytime you touch them. Alternatively, you could use a clear nail polish like I did to maintain its shine. Both the glue and the clear nail polish serves the same purpose but the nail polish gives it an extra shine.

Now, all your have to do is it stick your thumbtacks and use the Corkboard for any purpose. I used mine to hang my accessories like I mentioned earlier. But you could add any notes or reminders. My necklaces, bracelets and headbands are more visible and they don't get tangled anymore. Please believe me when I say I had to throw away 2 of my necklaces because it was tangled and couldn't be saved. *cries*

I feel that if you personalise and beautify you own work space, it makes you really excited and happy. After several DIY projects for my accessories, I find myself smiling everytime I decide what earrings or lipstick I should on wear that day.

Before I end this post, I would like to thank everyone who's been showing your continuous support towards my blog. Although I do not know who you guys are, I hope to hear from you all! So drop me an email or tweet or mention me on Instagram if you try out any DIY projects or food places I've been to.

Also, I'm about to embark a new journey in University so I might be reducing to one post per week but I hope you all could show me continuous support!

I will probably use my dreadful long travelling journey wisely by blogging through my phone. Before I continue  lengthening this post, just want to tell you y'all to have a great day!


Organizing Tips!

Hellooooo everyone!

Do you ever find yourself searching for a pencil or embellishment in the midst of doing a craft project? This happens to me way too often and for some reason I keep losing my stuff in my house and only find it months or years later.

I thought I couldn't be the only one facing this problem and I wanted to offer some organizing tips to make your life so much easier and neater.

Tip #1 : Place your embellishments in cute little jars.

I separated my ribbons, felt papers and glass beads into different jars. I got 4 of these jars at IKEA for $3.90. It makes organizing such a pleasant experience.

Tip #2 : Place all your craft materials in a box and label it.


Compared to a few years back, my craft materials has vanished quite a bit. I decided to only get materials when I really need them because it is so expensive in Singapore. *cries* I bought a set of box in IKEA as well when they were having a promotion. I cannot remember the prices as they differ according to different sizes. I was able to fit all my items in my boxes. 

I'm telling you guys, please label the them. It makes life so much easier. I used to have different boxes and trays to place my items but because they were no labels, things get mixed up easily. Also, I bought a few of these boxes in the same colour, I didn't want to open up each one to check which is which.

Tip #3 : Organize your pens/pencils/markers in different holders.

I took a piece of wood from a used bookshelf and my cousin helped with drilling the holes to place the thing (I do not know what it is called) to hold the container. Seek help if you cannot use the drill.

The container has a hook like back where I can hook it to the holder.

All these items were purchased from IKEA. The holders were sold for $1.80 for 6 pieces and the container was priced at $0.90 each. I had to use a piece of wood as the holders can't go through walls. This also served as a multi purpose function where the extra space is used as a platform to stick reminders and notes.

Tip #4 : Organize your things in a DIY Holder.

I made a tutorial for the above DIY holder a week back. Click on the link above for full details! My mum had been squeezing her skincare products in a small paper bag which looked not at all appealing and pretty on her side table. So I offered to make a holder for her and the overall result turned out really pretty. This looks even better than the one I made for the tutorial, so do check it out on how I made them!

Now my things are more organized and I have no problem locating them. Also, I have a bigger and neater working space after organizing my stationary. Although IKEA is the best place to go shopping if you want to do DIYs and Organizing, I personally feel that you can always find something old at home and turn them into something new. 

Lately I have been really inspired and the above pictures are results of it. Instead of having a difficult time searching for your missing items all over your house, start by organizing your things and you will see the difference in no time. Also, since Ramadan is here there will be less post on food and I shall make it up to you guys by posting DIY projects after I get more ideas. *winks*

Lastly, if you guys love cupcakes, I have a special post coming up very soon so do stay tuned!

DIY Earring Holder

 Hey guys!

Let me ask you something. Are you tired of misplacing your favourite pair of earrings? Are you frustrated of destroying your favourite earrings while untangling them? Fret not ladies, I have an amazing solution.

PRESENTING TO YOU, YOUR VERY OWN EARRING HOLDER


Do ignore my dramatic moment, I was just excited. A month back I had shared a tutorial on my Ear Stud holders and I mentioned that I made an organizer for my dangling earrings as well. I had to wait until I stocked up some really pretty looking earrings before I could upload as I wanted it to be visually pleasing to your eyes. *winks*

However, I won't be doing a tutorial tutorial because currently I do not need another one and I don't have anyone to give this as a gift. Nevertheless, scroll down to find out how I did this particular project.

It may not be filled totally but I am so happy with the colours on it. For this project, I only used about 3 to 4 objects and all of these items can be found at your home. That's the best part about DIY isn't it? I used an A4 sized photo frame which I purchased from IKEA (love,love,love IKEA), a pantyhose some cardboard pieces and glue.

You can use wire mesh or any kind of netting to hook your earrings but I couldn't get any of those from my home so I ended up using the pantyhose. Using a photo frame definitely has its perks. Firstly its pretty and simple design requires you little or zero effort to make it look more elegant. Secondly, it comes with a cardboard with a space in the middle as shown below.
Disclaimer: I do not own this picture, got it from Google Images.

So all you have to do is to insert this cardboard sheet into the pantyhose and attach it back to the photo frame. It is so simple and doesn't even take a lot of your time.

Unfortunately, if you noticed my frame, it is not very deep and if I were to wrap it around the cardboard sheet, the hooks of  my earrings will not be hooking itself onto the pantyhose very conveniently. Wow, that's a pretty long sentence but I hope you get what I meant. So what I did was I cut out some strips (2cm in width) and attached it to all 4 sides of the cardboard to give it some volume. This is made me hook my earrings easily. I liked the fact that my earrings will be resting on the soft pantyhose rather than the strong cardboard. Using a superglue I glued the sides so that it doesn't fall apart.

A close up look. For the background, I used a shiny gold coloured paper. You can use any background of your choice. I wanted to keep it simple and elegant as I wanted the focus to be on my earrings and not on the frame. I was really happy with the way it turned out because the colours complemented my earrings and every time I look at the collection of my earrings it makes the DIY so worthwhile and fulfilling.

Once you are done, you can choose to hang it on your wall or just let it rest on the table like I did. I did a tutorial on both the ear stud holder as well as the makeup brush holder so do check it out by clicking on their links.

It is a great display and it adds colours to my dull dressing table. If you are wondering where I got my earrings from, almost half of them were gifts from friends and family who went to Thailand and Australia for holidays. The more elaborate ones were from Tekka Market located at Little India. I must say they were really worth it as they were selling them for $10 for 3 pairs. Bugis Street also has several nice pairs but you would be spoilt for choices in Tekka Market.

Personally I think there is no need for me to do a tutorial on this project as it is so simple and there are so many demonstrations on YouTube. You can also check out videos on YouTube for more amazing variations on this project. 

Finding my earrings are definitely much easier and now it doesn't get tangled with one another easily. There have been moments where I tried to untangle them and I broke a few of my favourite pairs. *sobs* 

Finally, if you do like my posts, please continue to follow up and remember to share it with your friends. Have a great weekend y'all! 

DIY Documents Holder/Organizer Tutorial

Hello Everyone!

I know I have been missing for awhile and I have a valid reason. My mum was going to travel for the first time in 21 years and I was helping her with the packing and shopping. I wasn't able to find time to blog because I have been going out almost everyday. Now, I have finally found alone time where I can spend it doing some DIY and then share it with you guys! 

School is finally opening after a month break and although I won't be starting school till next month, I have made something useful for students out there. Well, actually anyone who have hardly any time to organize and keep your working table clean this would be really useful for you.

My beloved sister was my main inspiration for this particular project. Reason being, she always brings home a lot of assignments and she has not much time to keep the table clean after use. There are always a stacks of worksheets, notes and notebooks lying around which never fail to annoy me when I see the state of the table. As much as I love my sister, sometimes I just want to tell her off and ask her to clear up her mess. So, I decided to say it in a nice way by presenting her this.

Before I go on and on and on, these are the things that you would need.

These are the mega sized cereal packs. If yours is a smaller one, do check if the documents are able to fit inside. Alternatively, you can use a cardboard box. Cereal boxes have the perfect shape and takes little effort to alter the design. 

I would recommend you to use a pen knife or Exacto Knife for this project because it is definitely easier cutting the boxes with them compared to the scissors. Please be careful when using the cutting tools. If you have difficulties handling sharp tools, seek help from an adult.

Use your preferred glue or double sided tape. I used white glue.

These are for decorations so be creative!

Embellishments of your choice for decorations. These are optional.

Okay, now let's get started!

Using your ruler, mark your points and draft out the cutting lines on the cereal box. Do get creative and create a design of your choice.

I went with the simple default design. Do the same for the back. Make sure both sides are drawn correctly.

Next, cut along the lines to remove the unwanted areas.

It should look something like this. At this point, you can secure the bottom using a strong tape so that the documents won't fall out. You can choose to leave it this way but I'm sure you wouldn't want to tempt yourself with koko-crunch every time you take out and put in your documents.

This is my favourite part where you get to decorate it with your favourite papers and embellishments. You can also choose to paint them.


AND THE FINAL PRODUCT
.
.
.
.
.
.
.
.
TADA!


This is how it will look like after it is done. You can store your worksheets, papers or any documents to organize your table so that it looks more presentable and neat. Your work table should always be kept clean and inviting because it creates a conducive atmosphere to work. 

It is so simple to make and it is eco-friendly. Most importantly, it doesn't cost you a cent because all the items can be readily found at your house. If you think this is not strong enough compared to the ones sold in stores, just add a strong cardboard each side for a stronger backing. It is a great indoor activity with people of all ages. Start organizing your documents now for a cleaner environment!